Every time we start a fresh new wooCommerce installation, we experience the same problem: Are the default status values going to be enough for our fulfilment process? Majority of the time the answer is no. Please read on, if you experience the same problem or if you want to make your store professional.
Why is it important to have the status values?
Short answer: to have less customer calls. Any online shop owner knows that it’s painful to get several customer calls a day and tracking their orders down just to explain what is the actual status of their order because WooCommerce by default does not let us define status values other than ‘Pending’, ‘Processing’ or ‘Completed’ which in majority of the time gives no explanation to the customer so they call us. This is why it is important to have all the intermediary status values so we can keep the customers informed in every step of the process automatically and avoid them calling us for the information they can see themselves.
How can we create custom status values?
If you are software developer, there are several different ways to do that via WordPress & WooCommerce functions. If you are not tech savvy, the best way is to use our new plugin that lets you define unlimited custom status values and inform the customers when their order is updated.
Using the plugin is really easy. When you install and activate the plugin, you can start creating the status values from ‘Order Status’ -> Add New Menu by giving it a name and optionally customising the color values.
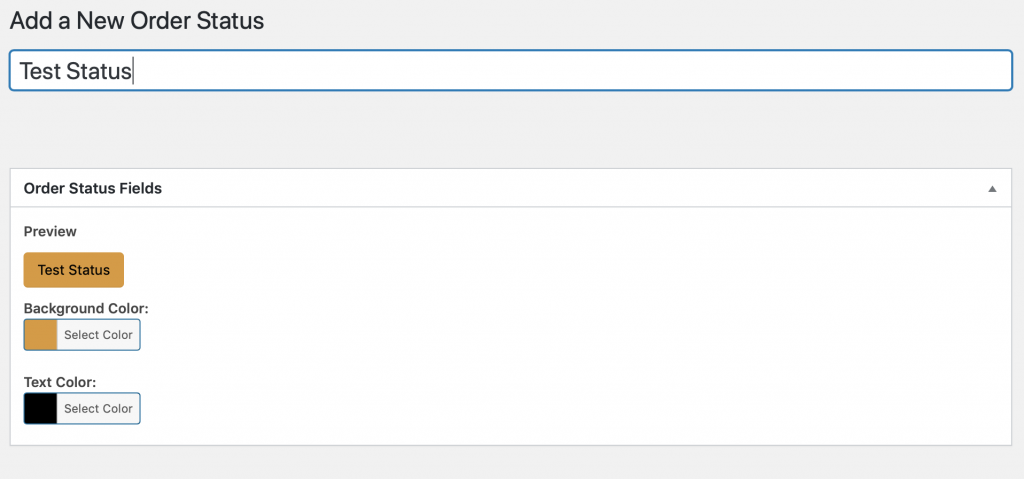
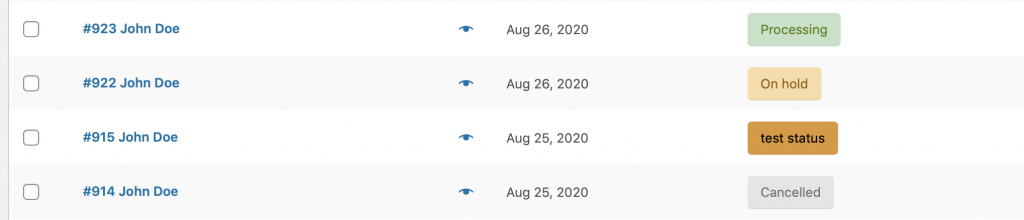
That’s it. The status you defined now appears on WooCommerce order menu and you can change your orders’ status to this new value.
If you want to inform the customers when order status changes to this new value, then you can go to ‘Order Status’ -> Rules menu and define a rule for sending an email.
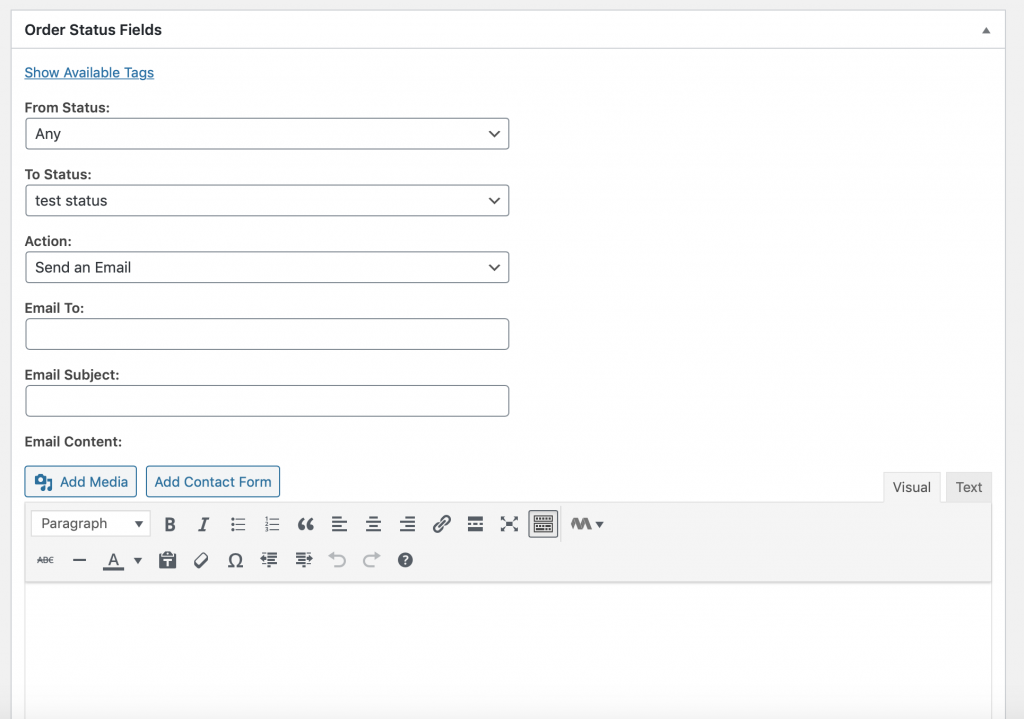
There are available tags that you can use on all the fields including subject and email content. Click on ‘Show available tags’ to see those tags. This way we can send email to admins by typing {admin_email} or to customers by typing {billing_email} to ‘Email To’ field.
Note: There are other rules we can define here but we will not be able to cover those in this article.
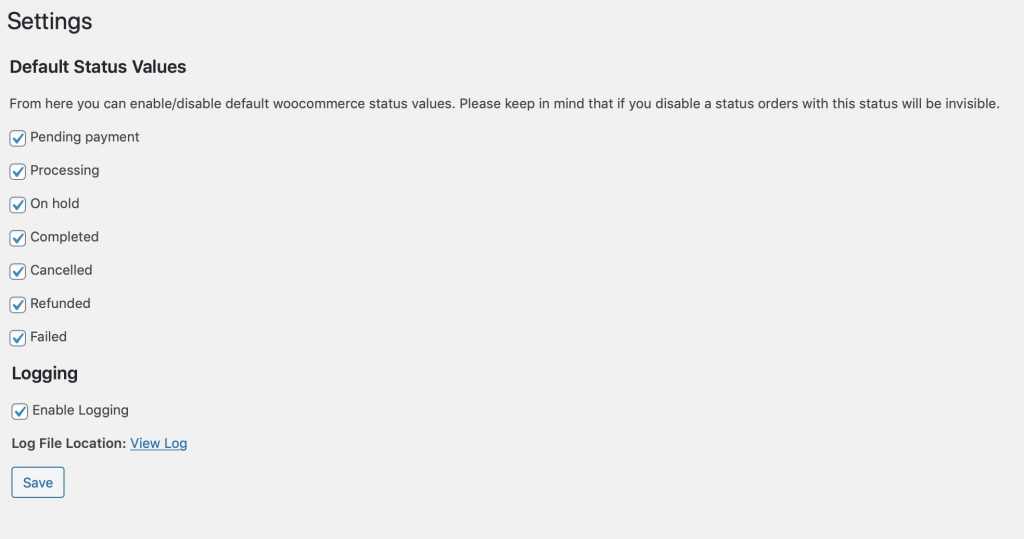
If you want to disable some default status values on your shop, you can do that from the settings menu by unchecking the default status values.
Now you have seen how easy it is to define status values and customise it based on your needs. Feel free to write us from team@novarumsoftware.com if you have any questions or feature requests. We release a new update every week so make sure to keep your plugin up to date!